The first step we'll try is simply to connect something that does something. We'll do an LED that lights up.
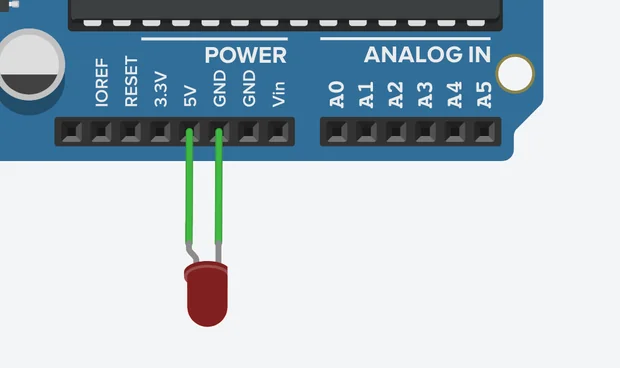
LED connected to Arduino
For this, you will need an Arduino, an LED, and two wires. Connect the following circuit: - 5V slot on Arduino to longer (=positive) leg of the LED - Shorter (negative) LED leg to GND slot on Arduino Now turn it on (Start Simulation). What will happen at this point is that the LED will fry.There is a way to fix this, but also, this is a brilliant time to start playing around with it. You connected 5 volts, and there is 3.3 volt slot right next to it. What happens if you use that? Feel free to explore! It is a simulator, and you can fry whatever you want without any real damage.Anyways, to fix the problem, we need to add a resistor. Why? Because otherwise, there is no LED. I'm sure this has something to do with Ohm's law and perhaps the 3 laws of robotics. The problem is that resistance equals voltage divided by amperage, and you only know voltage. And so, don't worry about it.
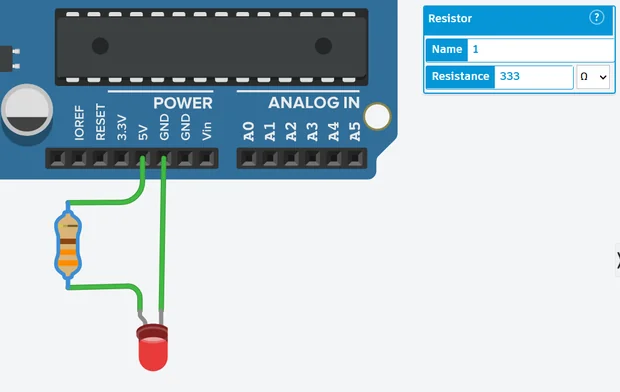
Working LED circuit
I can tell you that it needs a resistor set to 333 ohms. Why? Because a guy on YouTube said so. The thing is that while that works, it's not the whole truth. But I don't know the whole truth, unfortunately. If you set the resistor to anything below 19 ohms, your LED fries. Between 19 and 146, you will get a warning next to the LED. I assume the warning means that the LED would work but running it running it will reduce it's lifespan. 147 and up works like a charm, and I suggest playing around with the values while Arduino is on. This will enable you to observe that 333 ohms lights up the LED way more than 3333 ohms, etc.And that's it. You connected your first circuit, you fixed your first problem, and hopefully, you learned that tinkering is the best way to both get angry and learn something.You can now connect different components available in the simulator, such as Piezo, DC motor, Vibration motor, etc. For now, you may be limited to the ones with two terminals (legs), but don't worry about that, because learning to use the multi-legged ones is a science of its own.