Did you ever wish to be able to make your own Lego, build a robot, a crane, or a car that drives and turns wheels? Did you try to understand electricity, but failed, because of all the useless water flow and bouncing Plinko board analogies didn't make any sense to you? Did you ever encounter something like: there are 7 volts in and 4 volts out and it is somehow supposed to make sense because there is 15 ohms of resistance, which is clearly not true because there is no relation between those three numbers?For me, all of the above apply. I have zero understanding of electricity and its inner workings, the math behind it. I don't believe soldering works as they say on the internet but wasn't able to find the missing piece. I don't understand why an electrical component that clearly needs two connections has 7 of them. And from the bottom of my heart, I hate everyone that says that it is easy or that you just have to try or other useless stuff.And so, I decided to join the ranks of the idiots on the internet that explain something without the capacity to do so. I hope that my inability to understand this stuff will increase my ability to explain the little I've learned. This information will primarily serve me as a knowledge base, but should someone find it useful, that would be nice.Now a little info on where I will start and why, because that will not be level 1. It won't even be level 10. And so, there might be some things I describe that you will have to understand or learn elsewhere. I'm a very technically inclined person, which is why, when investigating something, I always need two things: 1) A working state of things 2) The smallest increment of change Without a working thing in hand, it's kind of impossible to try stuff. If you have a working prototype of something and add 5 different things to it and it doesn't work - that makes it hard to determine where the problem is, not to mention fixing it. Hence, I always try to go for the smallest or one increment at a time. This is the way I learned, and it is the way I recommend everyone to follow. And also, tell everyone that tells you otherwise to piss off, because those people are usually way too smart to actually be smart.When it comes to electricity, the easiest working circuit would be a battery and a wire, and then connecting + and - on the battery using that wire. I don't know what that would do, but I assume the best-case scenario would be nothing. And the worst-case scenario would be your home burning down. And so, not only I don't recommend you do that, but also, I recommend using a simulator.
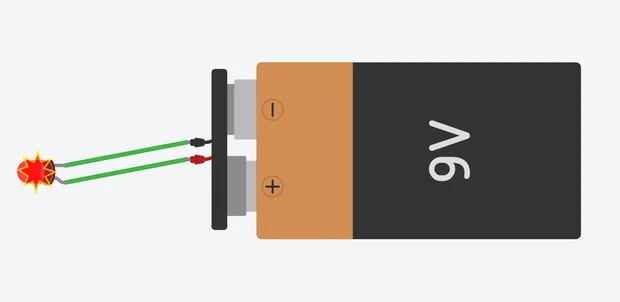
Exploding LED in simulator
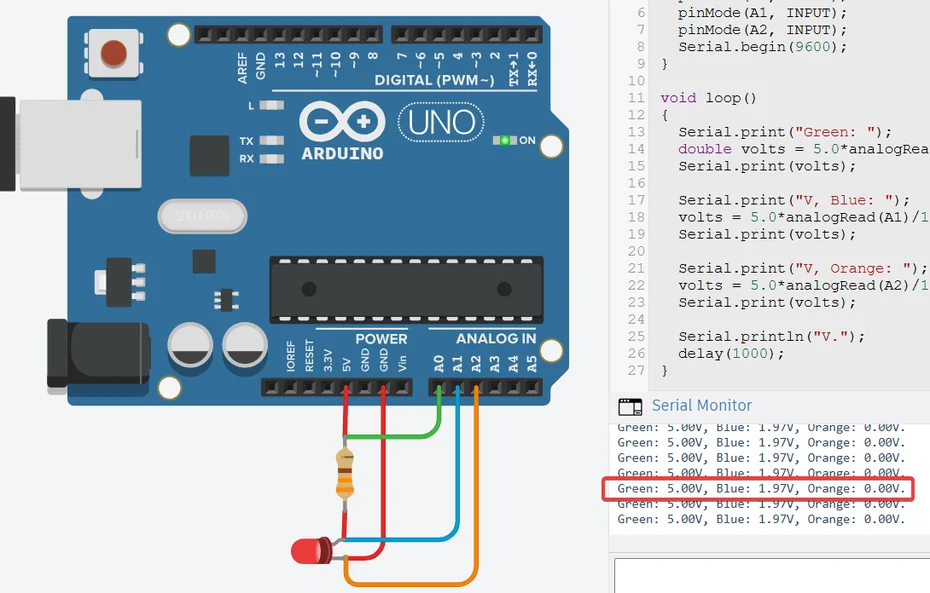
I found two simulators: Wokwi lets you tinker without an account, which is nice. And when programming there (don't be scared...yet), it has some sort of code completion feature. On the other hand, you can't use a battery there, and it doesn't tell you that you fried something. Tinkercad - You have your batteries and plenty of other electrical components. It tells you that you fried something. But it doesn't have code completions, and you have to create an account with Autodesk.I would recommend using both. Create/Tinker in Tinkercad and when it comes to programming, make use of Wokwi. At least if/until you get familiar with the programming, at which point you can stick with Tinkercad.The next step up that I will do before even starting is using one of them Single Board Computers (SBC) instead of a battery as a power source. Specifically, I'll be simulating an Arduino UNO, because that stuff is fairly easy and cheap to get should you decide to take things from the simulator to the real world. At this point I would like to stress that you should not be scared of this...yes, it's a computer. Yes, it's 100% not necessary for poking around with electrical circuits. On the other hand, you can use it the same way as a battery. You just won't be connecting + to something, something, something and to -. You will use pins on the board that will substitute for + and -. You can also program some pins to turn on/off on demand. But the real advantage is debugging. Imagine you create an electrical circuit, connect a battery to two LEDs and one of the LEDs doesn't light up. And you have no idea why. If you use ba battery,you'll have to rely on the good old trial and error debugging method. With Arduino (or any SBC), you can do stuff. In this case, stuff like reading the voltage from before the first LED and before the second LED. Which might not solve your problem, but it might tell you something. Yes, it is a little complicated, but it's super useful, and it is worth the stress. Please observe the following image. There is an Arduino UNO instead of a battery, and there is a circuit connected using it (Red wires). This circuit is: 5V pin as an alternative to a + on a 5V battery -> 333ohm resistor (without it, the LED fries) -> LED -> GND as an alternative to -. But there are also green, blue, and orange wires, which are used to measure the voltage before the resistor, before the LED, and after LED. And the values are listed on the right.
Arduino simulated circuit with debug information